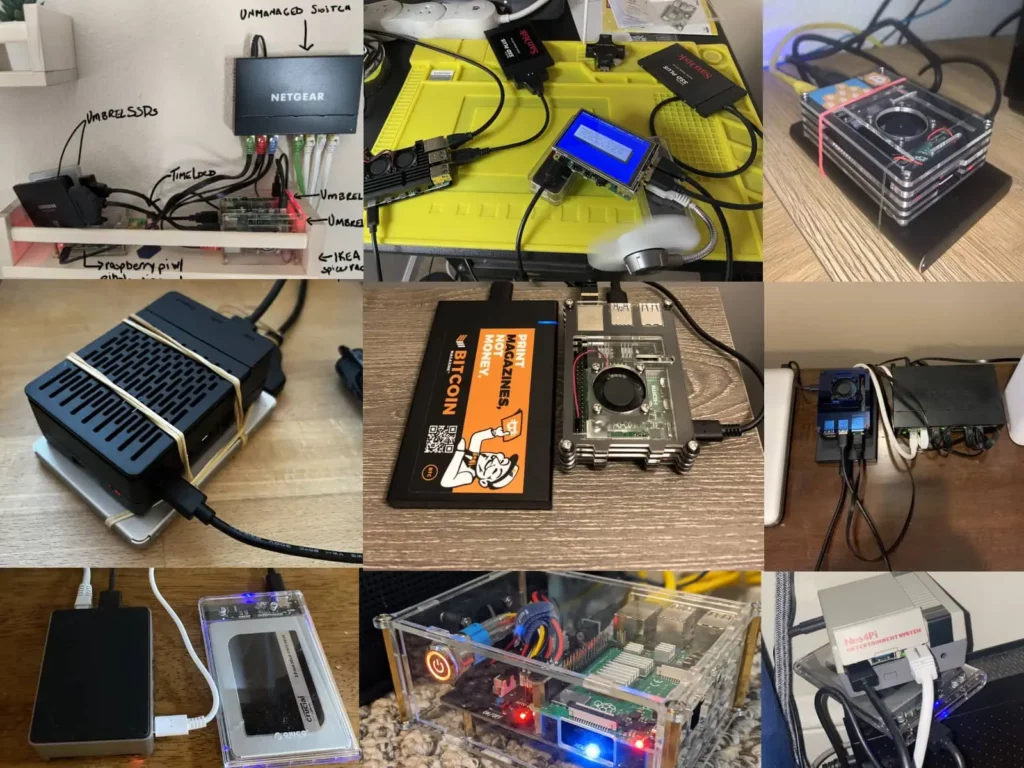
There’s a number of guides out there that already show you how to build an Umbrel node. Unfortunately they all end up looking the same, an ugly, horrific mess. Most follow the standard design template that’s given by Umbrel, resulting in a hideous rats nest of cables and cables hanging off everywhere like what you see below. It has to stop.
Here at Athena Alpha we’re not just experts at Bitcoin, we have over two decades of experience custom designing and building computers from scratch for clients. From 50 TFLOP AI compute nodes to your standard Raspberry Pi, when it comes to building sexy servers that have the right hardware for the job, we know what we’re doing!
Contents
Buying The Parts
One of the biggest problems with how 99% of people setup their node has to do with the parts they buy. Most people want to do it as cheaply as possible or just don’t give it too much thought. As said, we’ve built a lot of computers over the years and after much consideration believe that the below setup gives an excellent balance of longevity, cost and of course, sexiness.
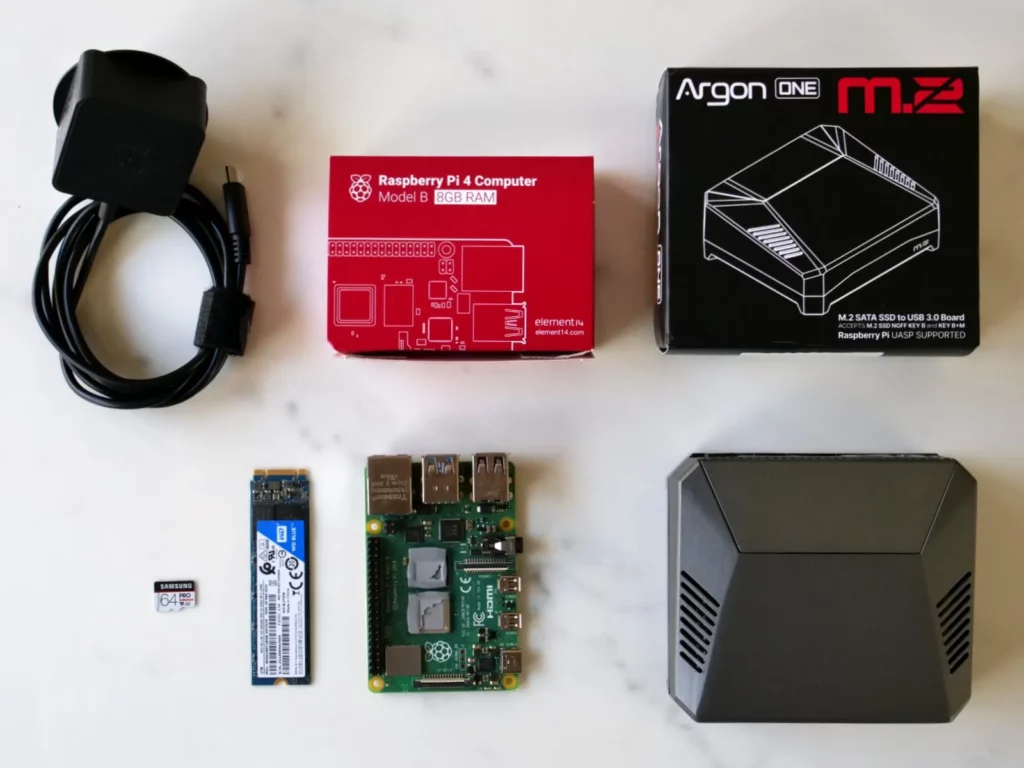
- $92 – Raspberry Pi 4 Model B 8 GB RAM
- $12 – Raspberry Pi 4 Model B Official PSU
- $7 – 32 GB+ SanDisk High Endurance microSD Card
- $47 – Argon ONE M.2 Case for Raspberry Pi 4 with SATA SSD Support
- $132 – 2 TB Western Digital SATA M.2 SSD
- Total Cost: ~$290
Updated Specs List For Pi 5 – Highly Recommended!
As the Raspberry Pi 5 has now been released we’ve also included the below parts list if you’d like to use that instead. We’d heavily recommend it, as the Pi 5 is a lot faster than the Pi 4, will get support for much longer and most importantly supports NVMe M.2 drives as opposed to the SATA based M.2 drives listed above.
- $88 – Raspberry Pi 5 8 GB RAM
- $17 – Raspberry Pi 5 Official 27W PSU
- $8 – 32 GB+ SanDisk High Endurance microSD Card
- $49 – Argon ONE V3 M.2 NVME PCIE Case For Raspberry Pi 5
- $160 – Western Digital 2TB WD Blue SN5000 NVMe M.2 SSD
- Total Cost: ~$322
The rest of this article is for the Pi 4 parts list, but the assembly process is essentially the same.
Why We’ve Chosen These Parts
First off we’re choosing the 8 GB RAM model of Raspberry Pi 4 as that’s what Umbrel suggests to use and we concur. 8 GB of RAM is plenty for most people and until the Raspberry Pi 5 16 GB RAM model appears, it’s as big as you can go.
Next we strongly recommend you pony up the extra cash and buy the official Raspberry Pi 4 PSU as it will supply your Pi with a much more stable power signal than some random (and likely crap) USB-C power brick. Trust us, you do not want power issues as they’re a nightmare to troubleshoot! They can also destroy various components costing you not just time, but money.
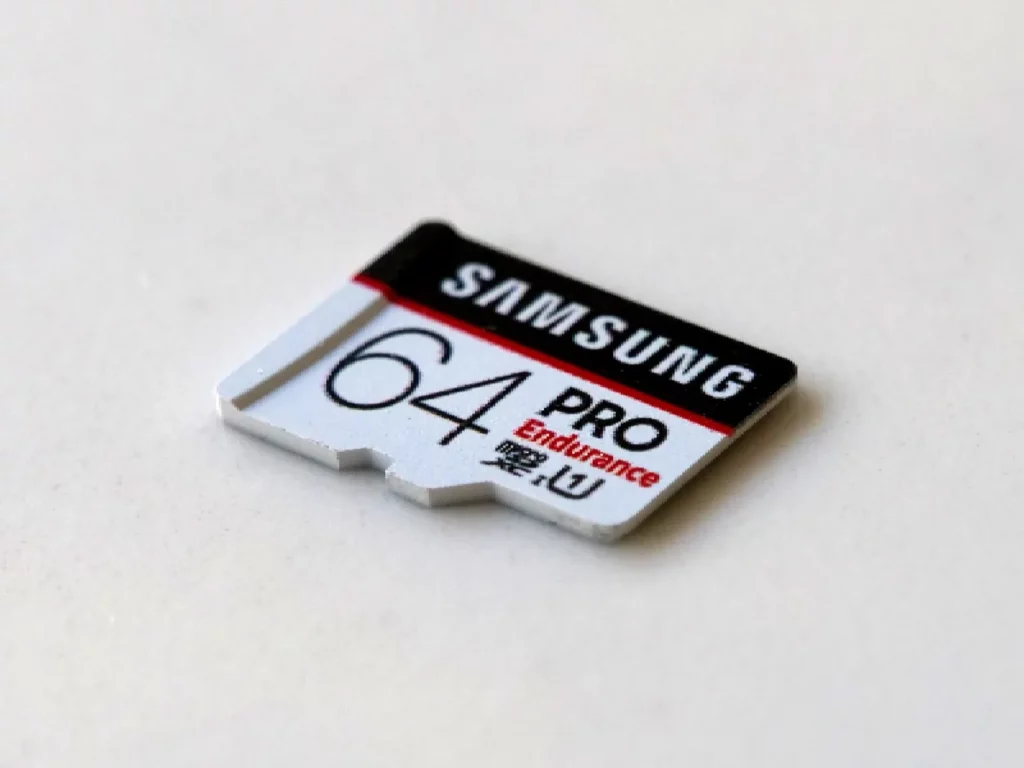
When it comes to the microSD card, make sure it’s from a solid brand like SanDisk, Samsung or Kingston and that it’s one of their “endurance” or “industrial” models. These ensure much better read/write durability which means your entire OS that’s stored on it won’t just randomly corrupt every few months. Given the price difference of a few dollars, it’s again a no brainer.
Finally is the SSD. We recommend at least a 2 TB size as the Bitcoin blockchain is now starting to approach 600 GB just on its own. If you want your node to last another 5-10 years it’ll need more room to grown than 1 TB, not to mention any other files you’re self hosting or sharing.
Furthermore a “2 TB” drive doesn’t actually give you 2 TB of space, once formatted you’ll only have around 1.82 TB available. Take away 600 GB for the blockchain and now you’ve got 1.2 TB for files, future expansion etc. We think this is a reasonable amount and again, there isn’t much cost difference between 1 TB and 2 TB.
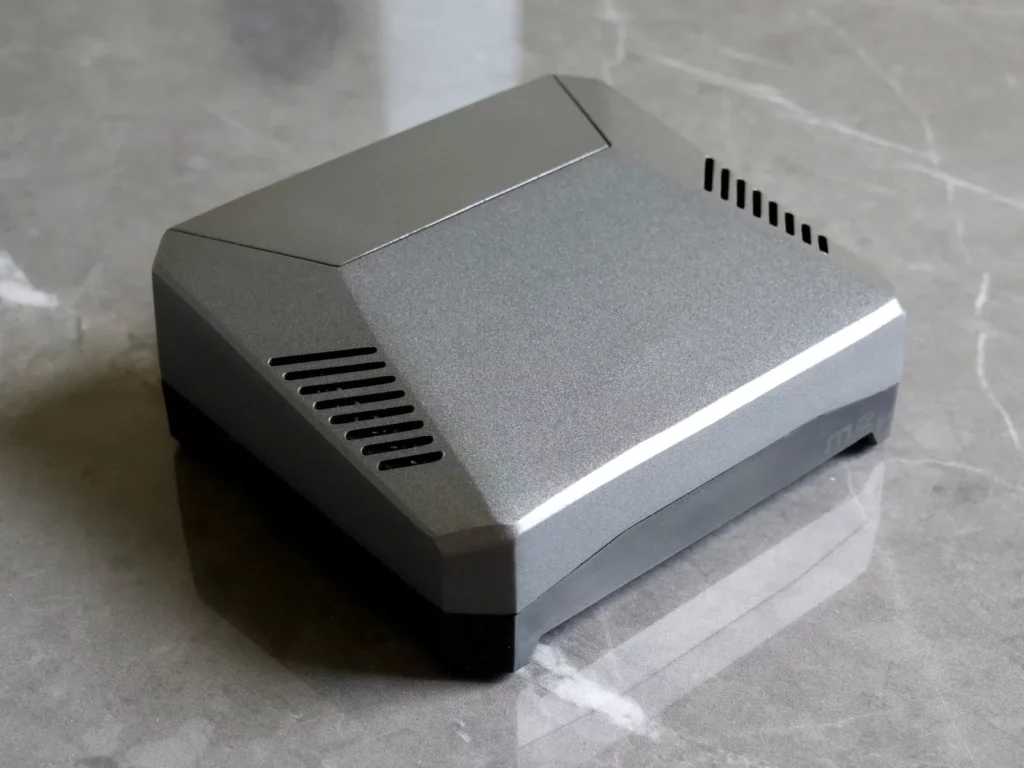
One thing that you’ll notice is that it’s a M.2 drive, not an external 2.5 laptop drive with its own enclosure. This is because the Argon ONE M.2 Case we’ll be using allows you to have your Raspberry Pi 4 and M.2 drive all enclosed up nicely in a super beautiful case that looks more like a proper, store bought setup than a rats nest of ugly wires.
Again it’s a little bit more cost wise, but given its metal, looks beautiful, has better thermals and also includes a power on/off button we think it’s definitely worth it. There’s no separate 2.5″ SSD enclose hanging off your node with a USB cable making it look way better.
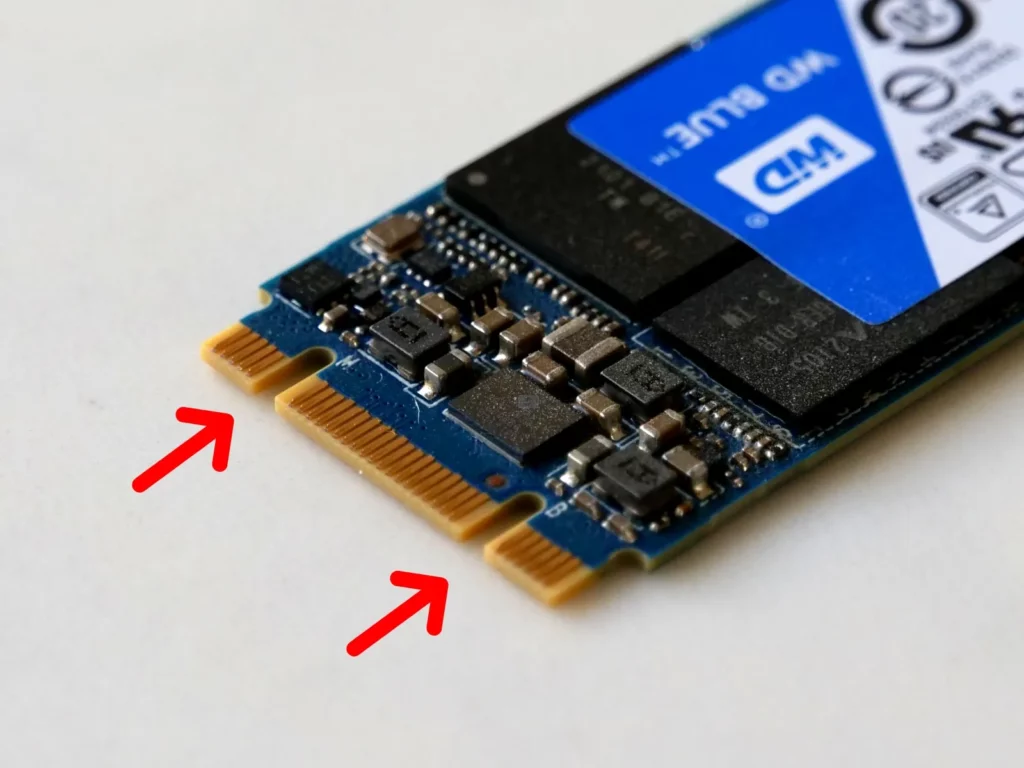
Importantly, make sure you buy a SATA based M.2 drive, not an NVMe one. (unless you’re using a Pi 5) These will have a B-Key or B+M Key design as shown above in red and run on the SATA protocol which is different to NVMe drives. Again ensure it’s from a reliable manufacturer and ensure it’s SATA with the B-Key design otherwise it won’t fit into the Argon case.
Compared to the parts that Umbrel suggests – that looks like a rats nest – you’re looking at spending around $50 more to get this fully enclosed, more premium look with the 2 TB drive only adding an extra $22. In total it’s $215 vs $290, only 35% more for a fantastic looking node that will last a good 5-10 years easily.
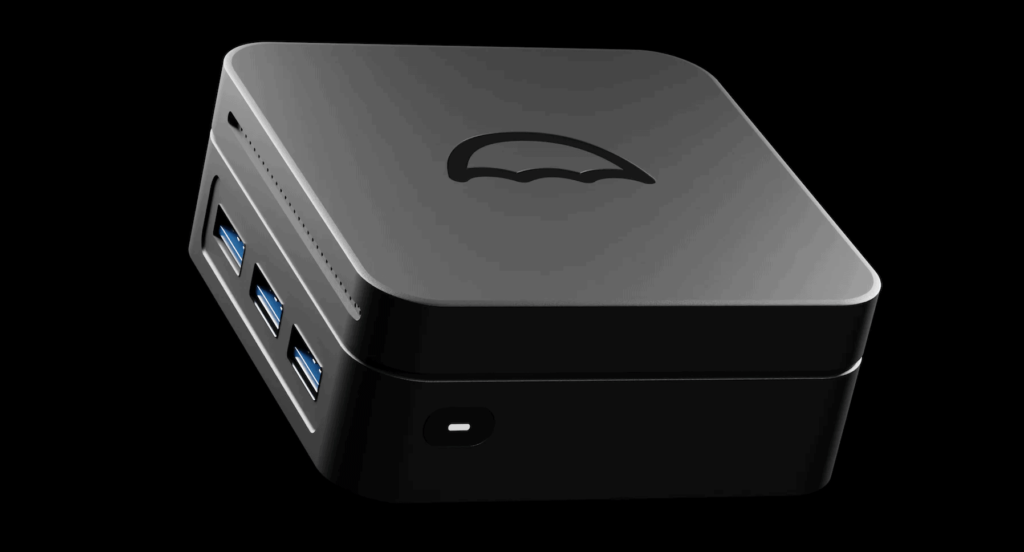
For another comparison the Umbrel Home, a custom built node by Umbrel, retails for $500 USD. Our setup is a full $200 cheaper that we think looks just as good. That being said, the Umbrel Home does have 16 GB of RAM and a faster CPU that they claim is 2-3x faster.
Then again, with the release of the Raspberry Pi 5 that’s also supposed to be 2-3x faster and also have a 16 GB RAM model this lead might be very short lived!
Download And Install Umbrel OS
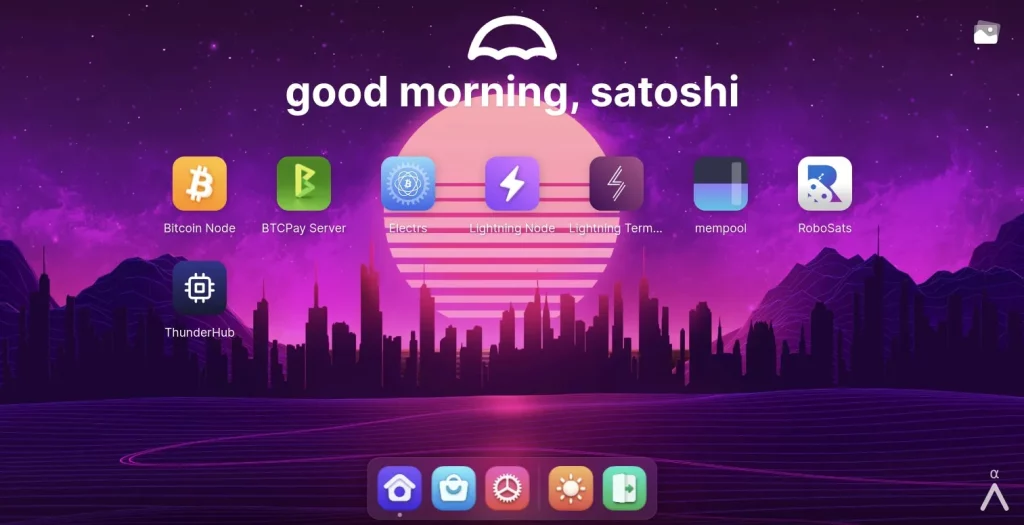
Before we build the node hardware, we first need to put umbrelOS onto our microSD card, as you can’t get to the microSD slot once the Argon ONE case is all assembled.
- Download Umbrel OS Files: Click here to download the latest UmbrelOS for Raspberry Pi
- Download Balena Etcher: Download and install Balena Etcher as this is what’s used to flash the UmbrelOS files onto your microSD card
- Flash Umbrel OS: Plug your microSD card into your computer or laptop, then open Balena Etcher and flash the unbrelOS.zip files onto your microSD card
How To Build An Umbrel Node
Now that our microSD card is ready comes the fun part, assembly! If you’ve got kids, this is a great project to do with them or just with any friends over a weekend as it’s quick, simple and interesting.
1. Install the MicroSD Card
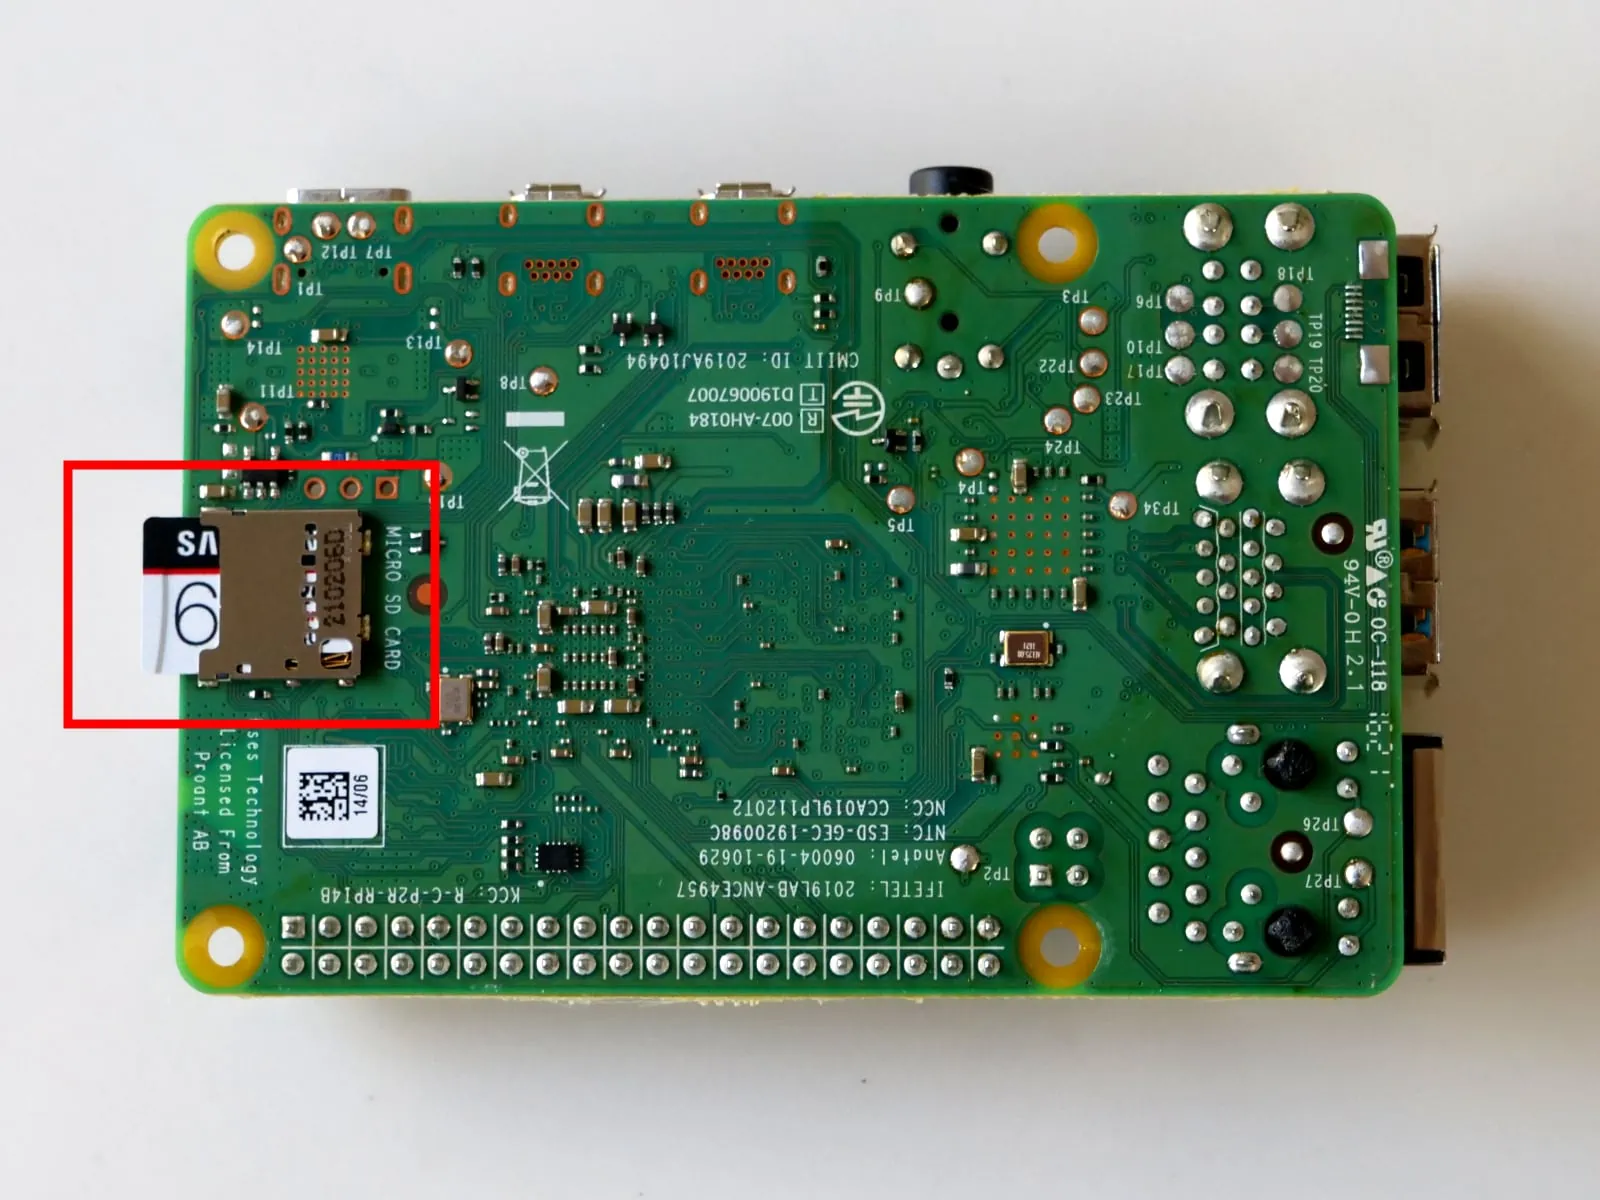
Insert your microSD card into the back of your Raspberry Pi 4
2. Install The M.2 SATA SSD
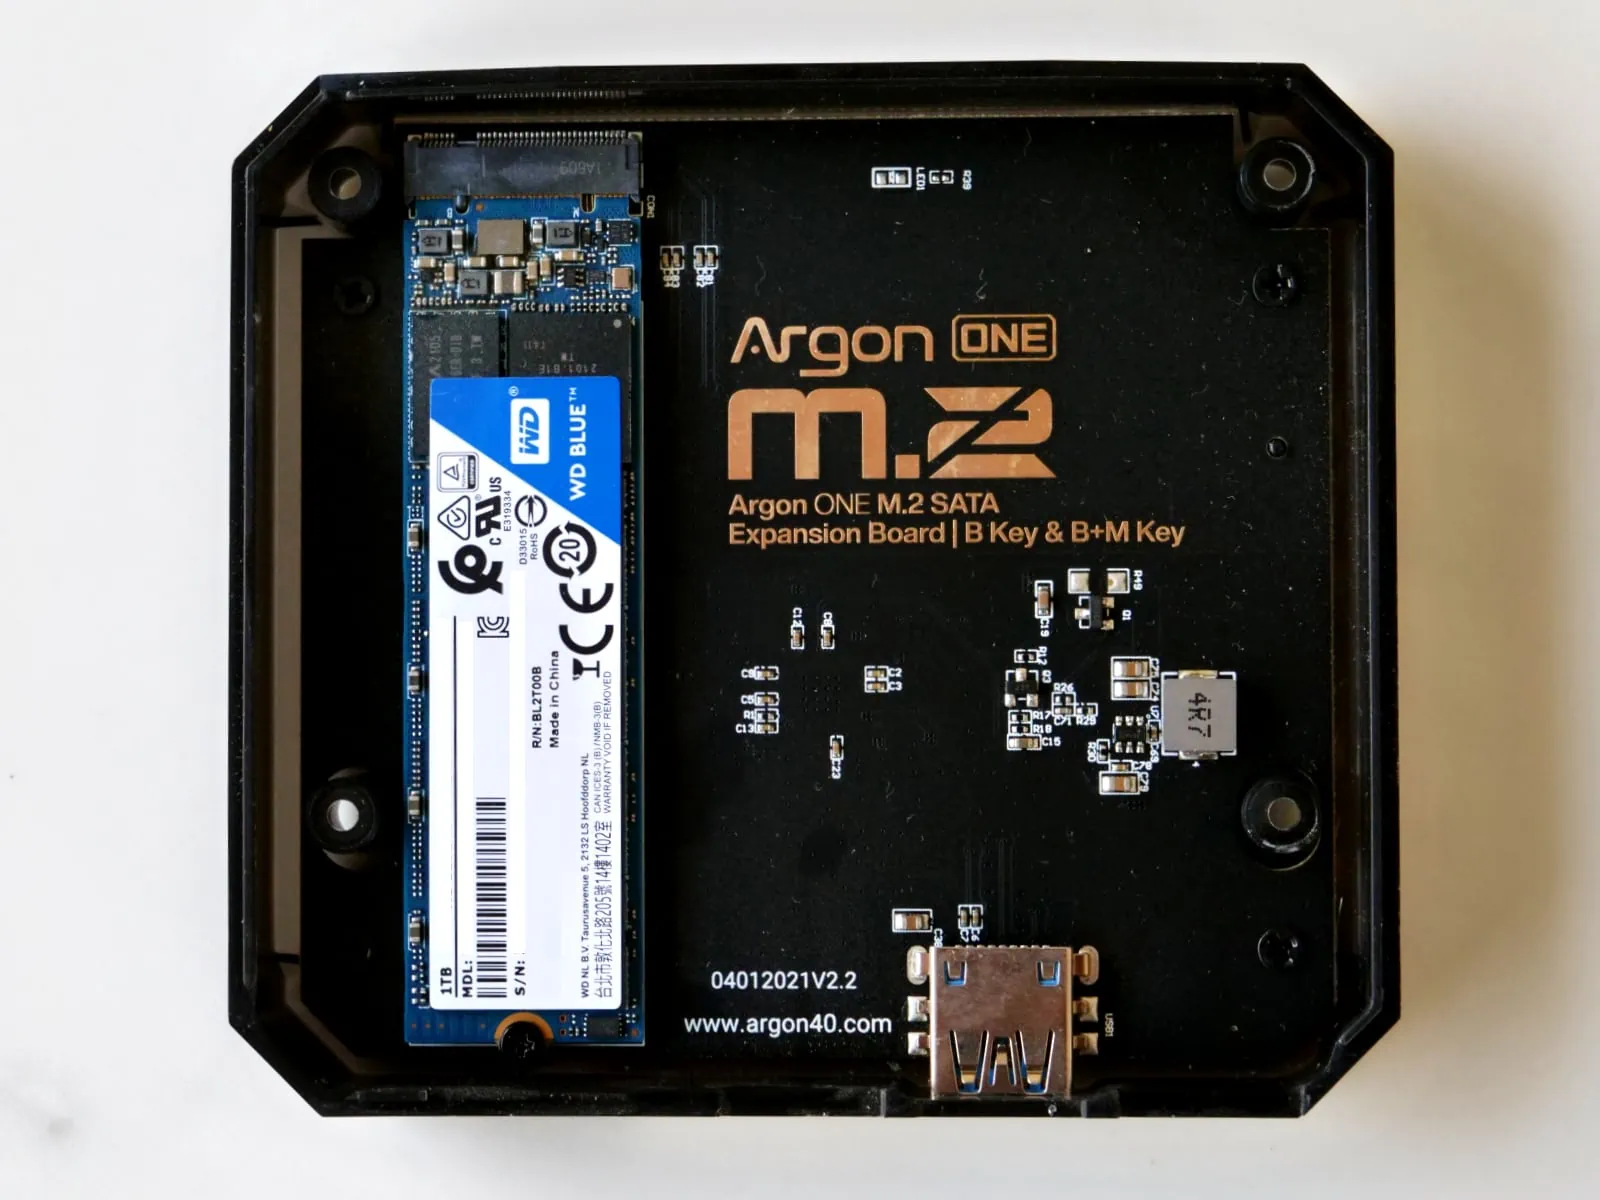
Insert your M.2 SATA drive into the Argon ONE case expansion board and screw it in
3. Join The Raspberry Pi & Mini Board
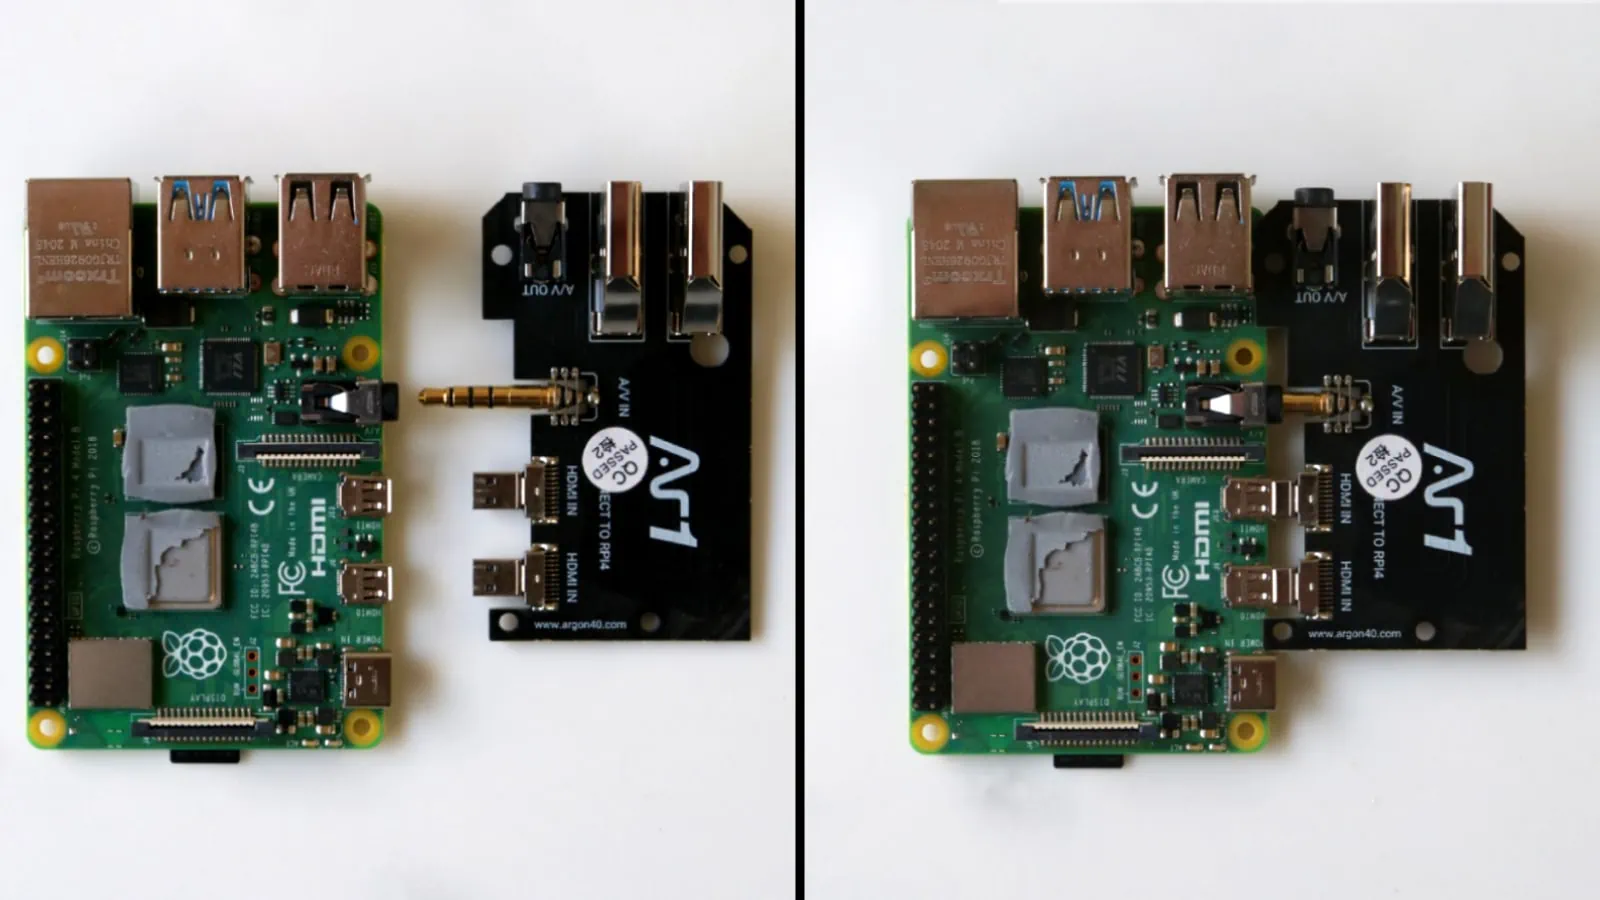
Connect the Raspberry Pi 4 and Argon ONE mini board together. Do this slowly, but firmly as you don’t want to break the fragile connectors or the board itself
4. Apply The Heat Sink Pads
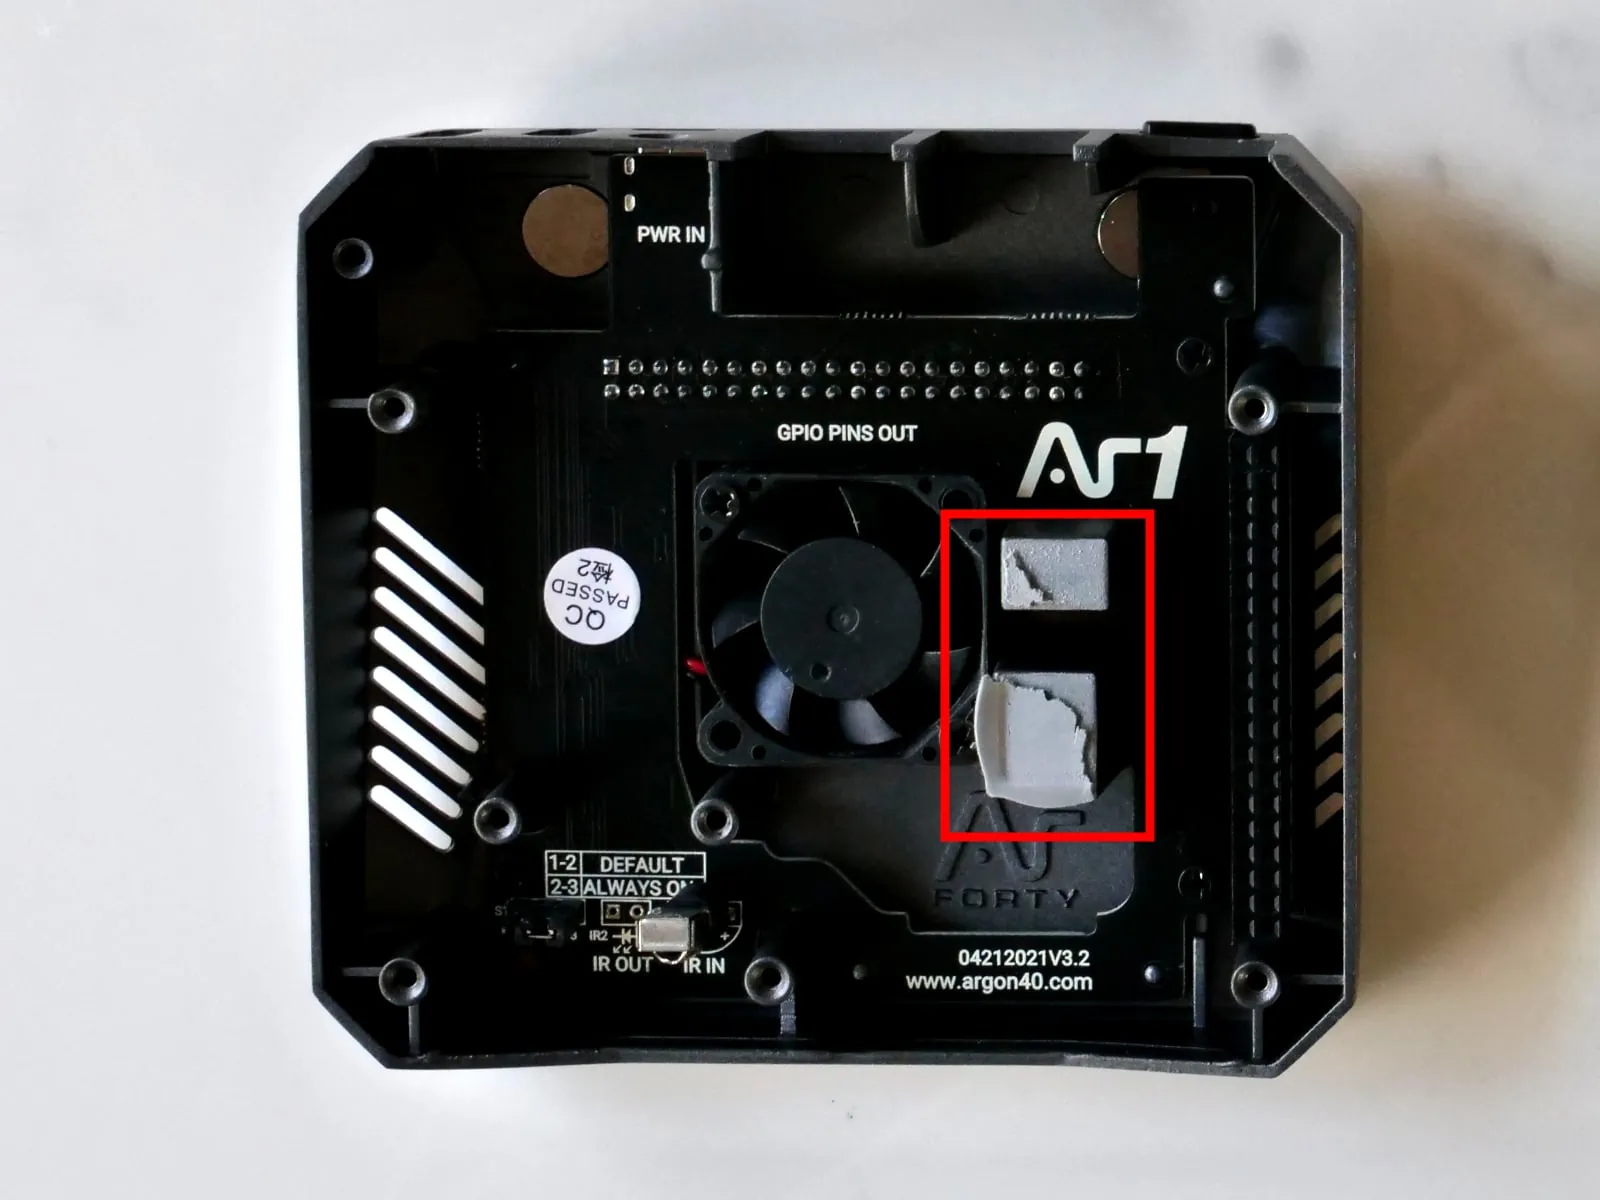
Peel off the provided thermal pads and apply them to the two Raspberry Pi 4’s chips as well as the two small heat sinks that are on the top of the Argon ONE case next to the fan
5. Screw In The Main Boards
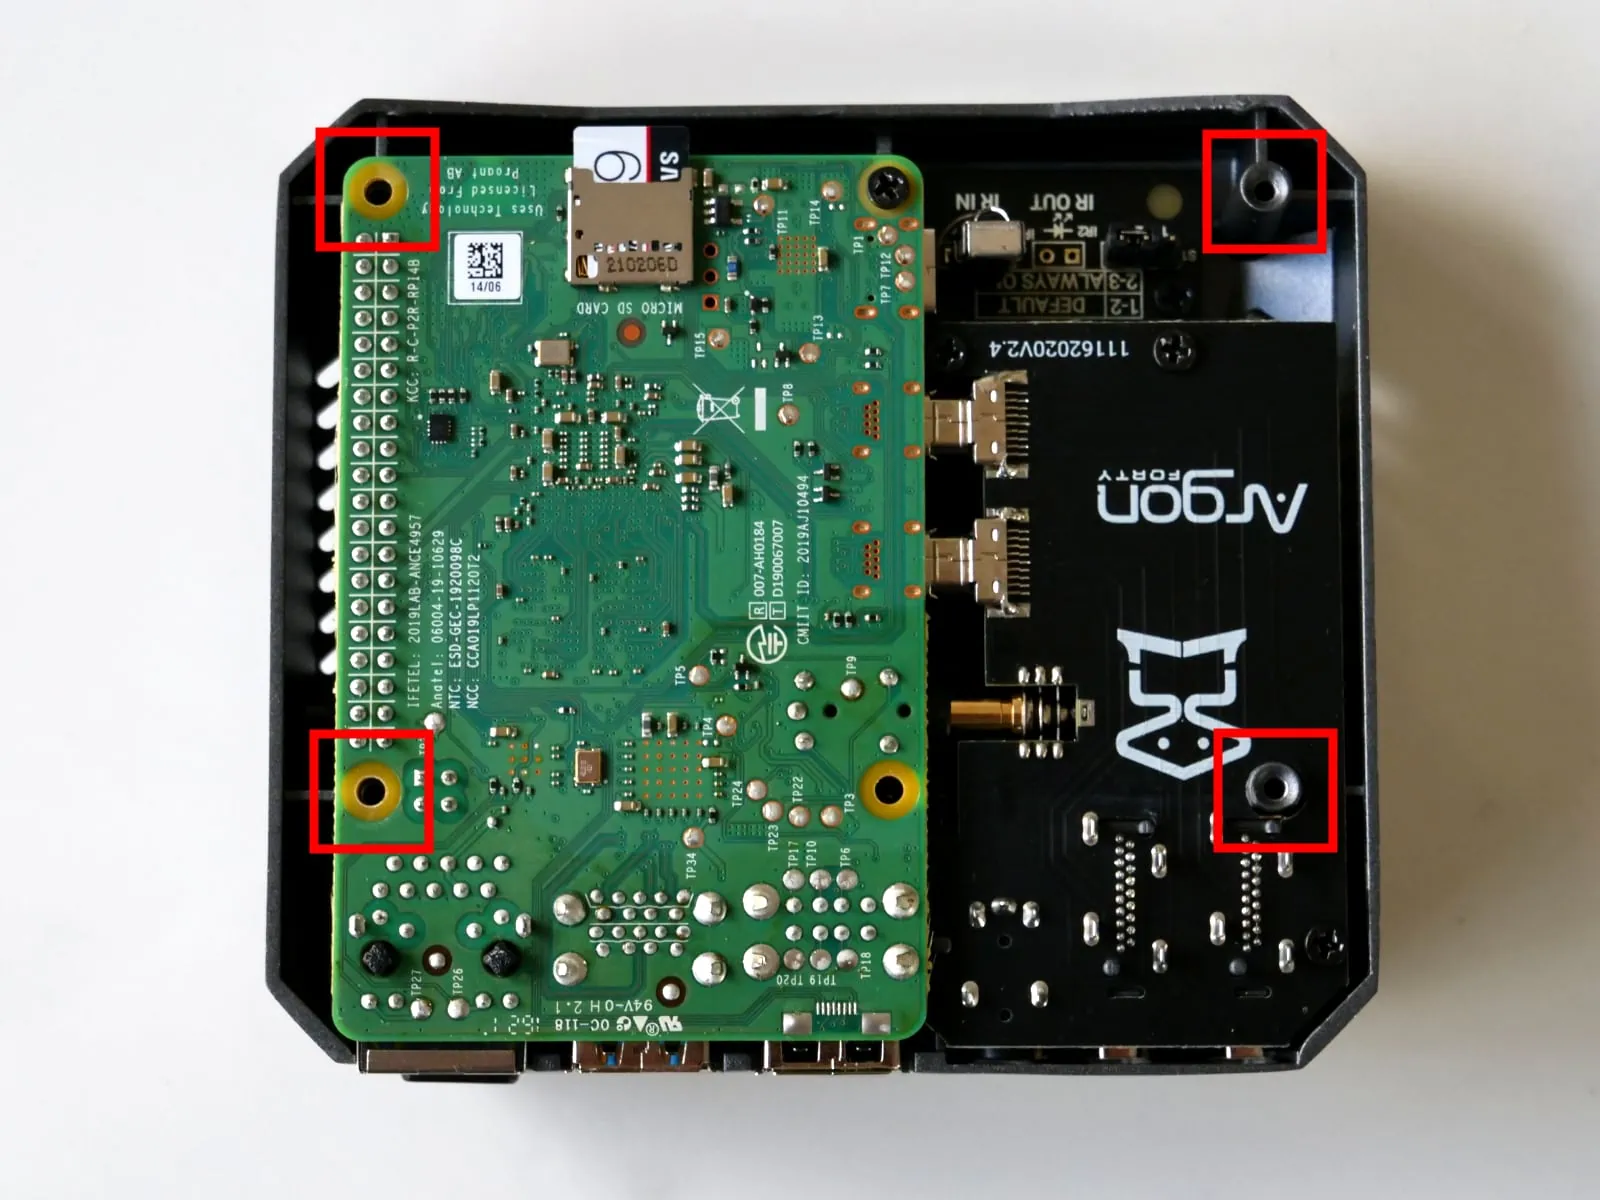
Insert the connected Raspberry Pi 4 and mini board into the Argon ONE case and screw it in with the provided screws. Make sure not to use the four outer screw holes (as shown in red) as this is what the case base screws into. The ports on the back should line up nicely and you shouldn’t need to apply excessive force to get it to slot in
6. Set The Node To Auto Power On
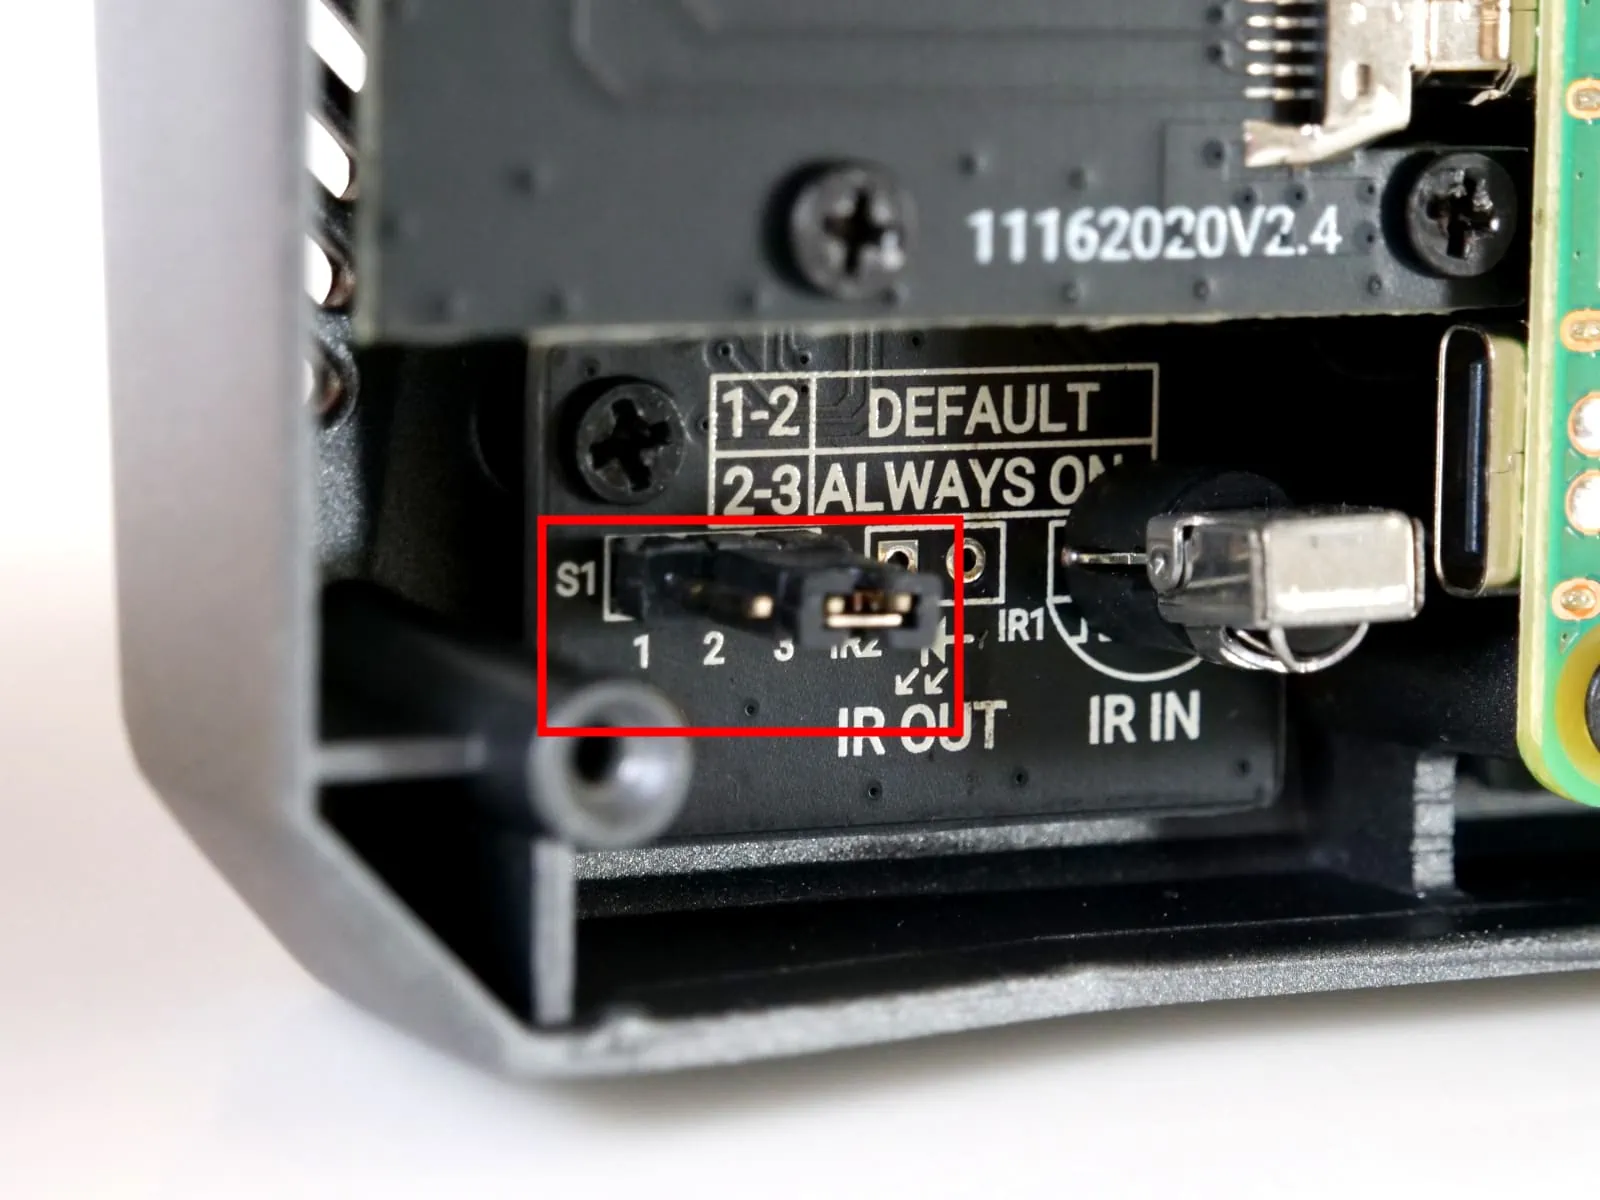
Change the S1 jumper to the “2-3 Always On” position, this will make your node automatically start back up again if there’s a power outage rather than you having to do it manually
7. Fully Assemble The Case
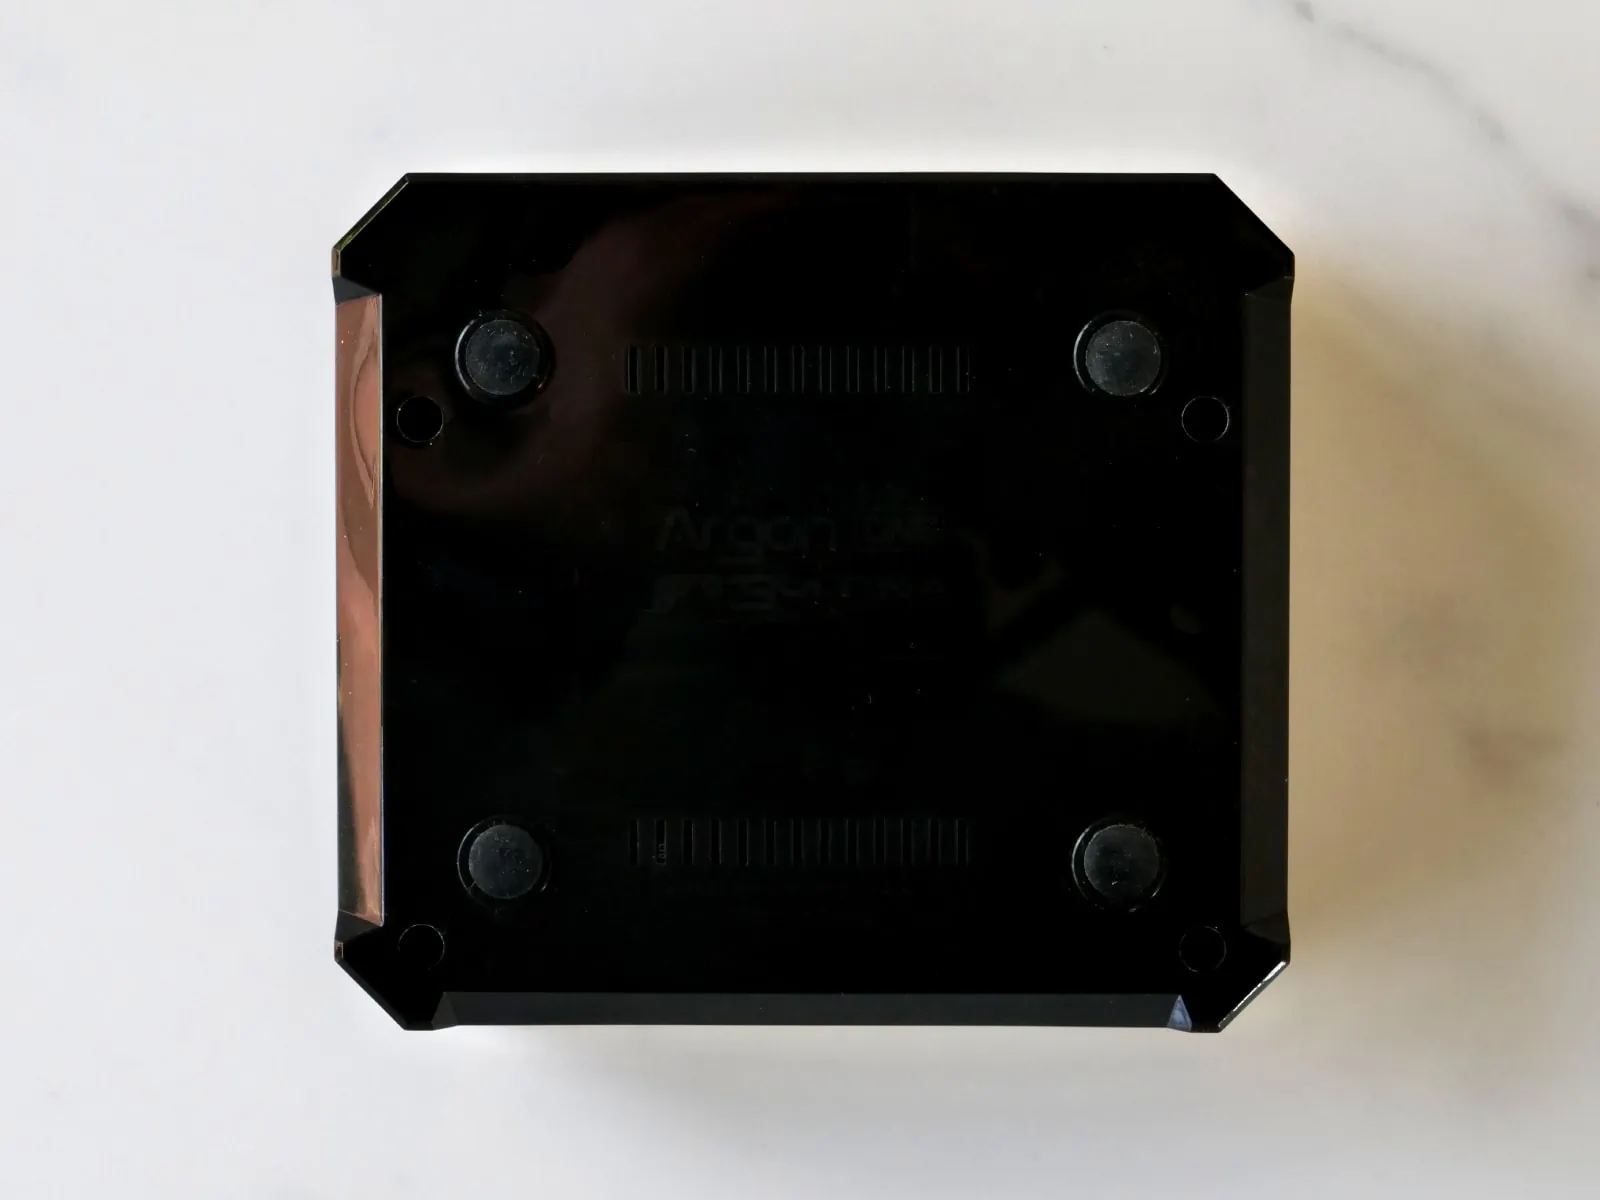
Put the bottom of the case on and screw it in with all four screws
8. Attach The Expansion Board Dongle
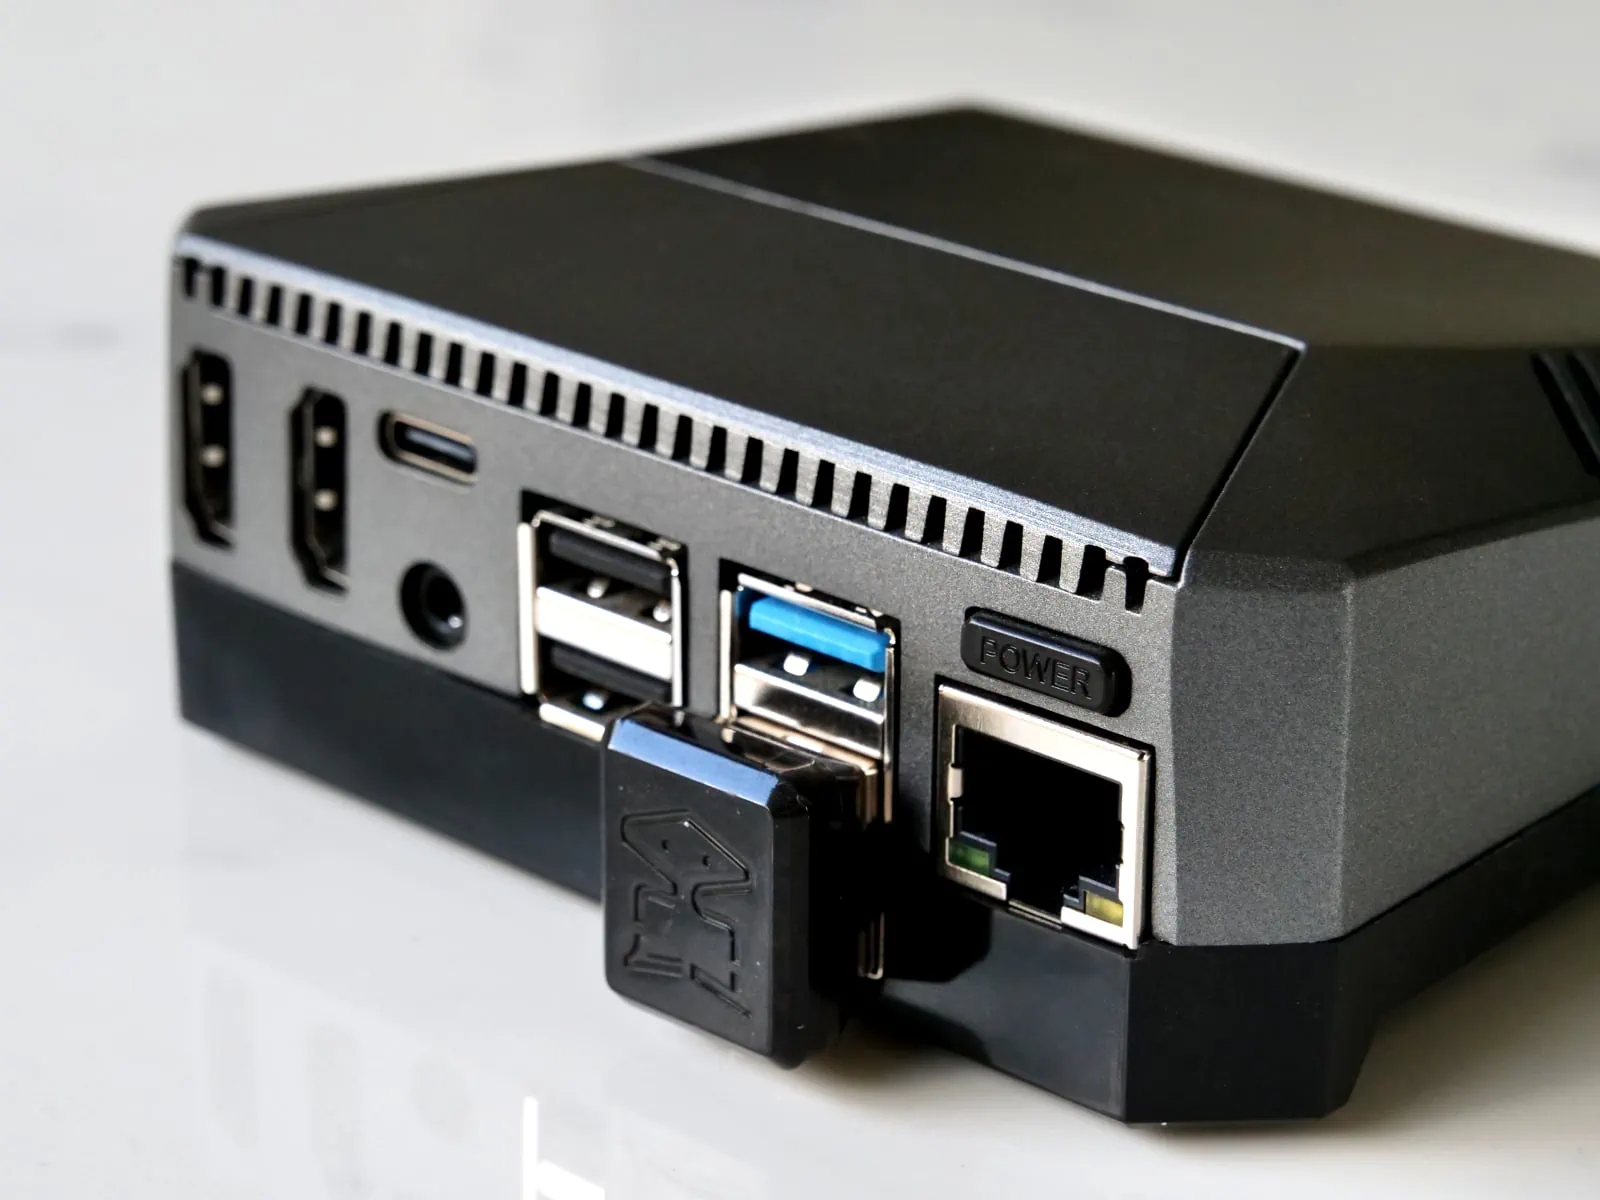
Plug in the USB dongle at the back so that the bottom expansion board (and your M.2 drive) is connected to the Raspberry Pi 4
9. Power Up!
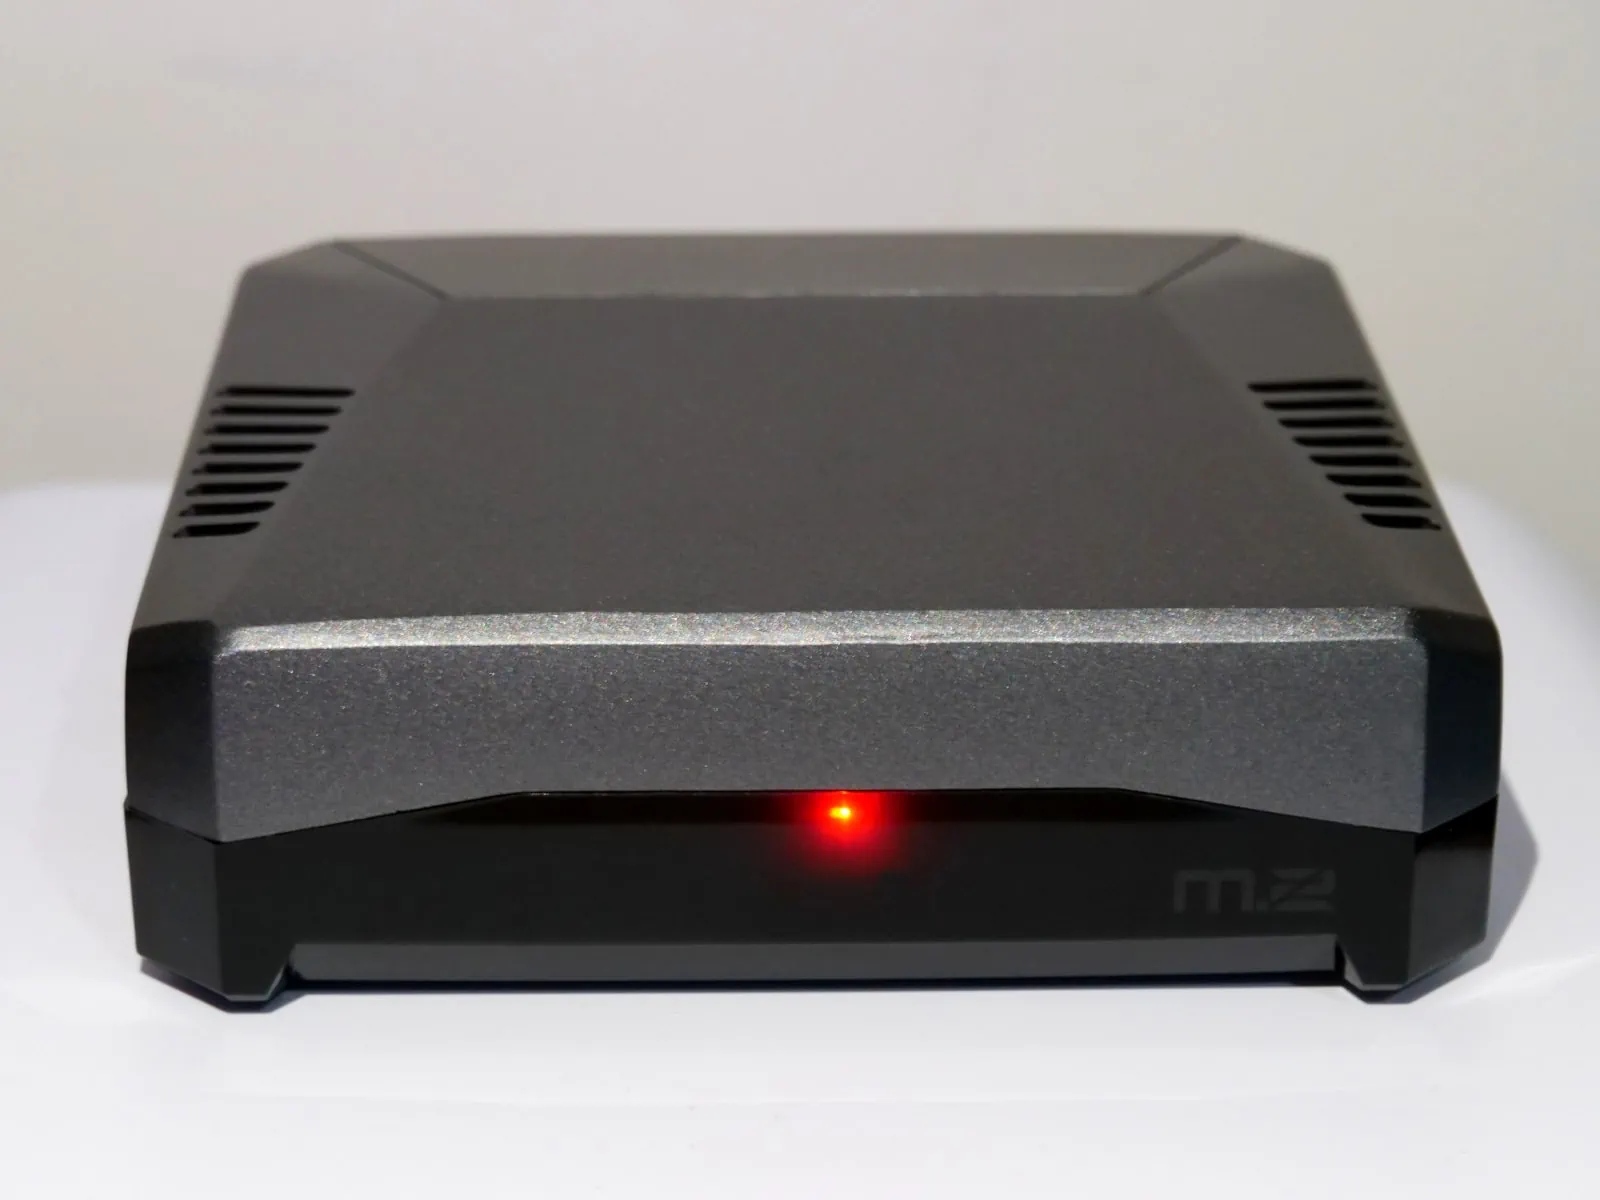
Plug in the Ethernet cable, then plug in the USB-C power cable. If everything has been done correctly, your node should spring to life and you should see a red LED on the front of it turn on HAL-9000 style
Connecting To Your Node
After 5 minutes, go to any computer or phone that’s on the same network and in any web browser go to http://umbrel.local. You should see the setup wizard start up and guide you through the rest of the process of setting a username and your Umbrel password.
Umbrel Vs Home NAS
If you’re considering an Umbrel node, you may also be thinking about getting a full blown NAS, so what’s the difference?
Umbrel nodes are small, cheap devices that don’t have a lot of CPU power or storage space. For example even the latest Raspberry Pi 5 only has an ARM Cortex-A76 2.4GHz CPU and might be paired up with a 1 TB drive.
Contrast this to a more typical Network Attached Storage (NAS) unit like the Synology DS723+ or DS923+ which has an AMD Ryzen R1600 CPU that can boost up to 3.1 GHz and can easily fit four 16 TB hard drives enabling a massive 48 TB of fully redundant storage.
One is clearly a “starter” home lab while the other is a more advanced and much more costly and capable unit. As such we’d recommend people view these as different tiers along the lines of:
- Umbrel: Complete beginners who want something around the $300 mark with a bit of storage and are just experimenting or who aren’t very comfortable with using the command line
- NAS: More advanced, tech savvy users who are OK with spending $1,000+ for a solid NAS and the accompanying HDD’s that go in it plus that are familiar or willing to learn about more advanced concepts like VLANs, port forwarding, Docker containers and can manage 3-2-1 data backup properly
As you can see they’re for similar, but slightly different audiences. It’s also possible that a person might want both as you could use the NAS for a much more robust, personal server whilst using the Umbrel node as a separate Bitcoin full node.
Using Umbrel: Pros & Cons
Pro: Amazingly Beautiful & Simple UI
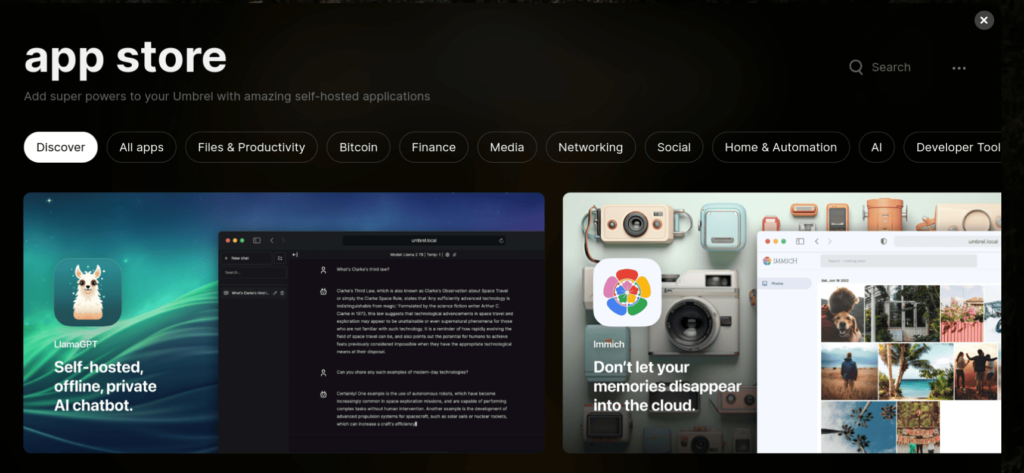
Immediately apparent right from the start is Umbrels gorgeous interface. From the setup wizard to the home screen and even settings area the level of polish is head and shoulders above everyone else.
Beyond just being pretty though, the interface manages to have a huge array of settings and options that advanced users can tweak and play around with, whilst at the same time being very simple and inviting for beginners. This is not an easy thing to do and it’s a big reason why Umbrel is so fantastic.
Pro: Excellent Support, Community & Forum
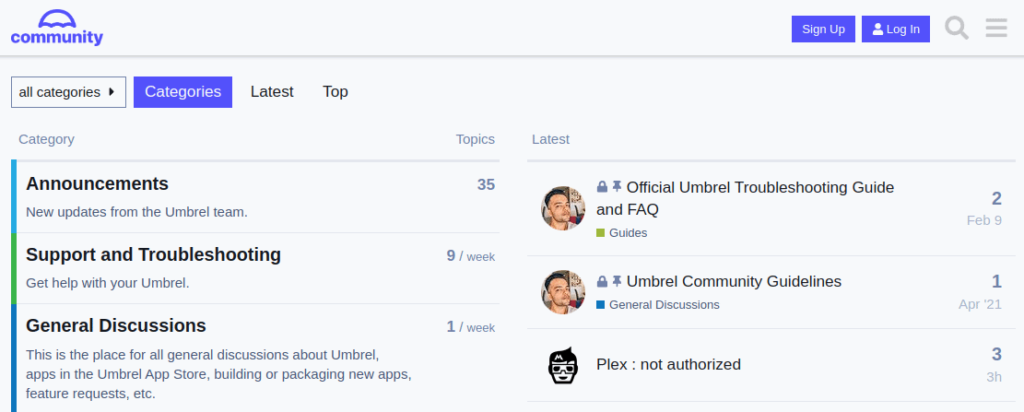
Umbrel also has a growing community forum that you can join and post to. There’s tons of instructional guides and discussions including common problems or errors that you might encounter. We also have a number of our own guides such as:
- How To Connect Bisq To Umbrel
- How To Connect Sparrow Wallet To Umbrel
- How To Connect Green Wallet To Umbrel
- How To Connect BitBox Wallet To Umbrel
- How To Connect Lily Wallet To Umbrel
- How To Connect Zeus Wallet To Umbrel
- How To Connect BlueWallet To Umbrel
Pro: Seamless App & OS Updates
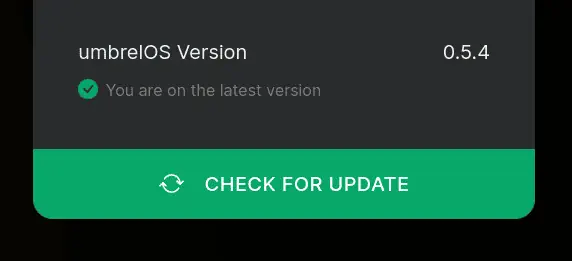
Umbrel comes standard with in built OS and App updates. When a new update is available you’ll get a notification up the top with an Update button allowing you to update everything with a simple click. Apps also get regular updates and can be accessed and updated via the Umbrel app store.
Con: Privacy & Security
One of the first and most important issues we have with Umbrel is their lack of security. When you first use Umbrel you’ll quickly notice that it doesn’t use encryption. The URL will read like “http” not “https”. This means that anything you send, including passwords, files and more will be sent in clear text for anyone to read.
Even across the Tor network, it doesn’t fully secure your data as the Tor exit node (which can be run by anyone) is what decrypts the Tor data and forwards it onto your node. That exit node can thus see anything that’s in clear text which is again, any password or files you send.
Tor also doesn’t provide data integrity or confidentiality meaning someone in the middle can alter your data and perform man-in-the-middle attacks. Full, end to end TLS 1.3 encryption solves all this which is why you normally see sites using “HTTPS” in their URL.
While Umbrel doesn’t try to hide this security issue (they state it in their security.md file), until they address this issue they’ll never be taken seriously in the broader community of home labs and personal servers.
Con: No Data Backup Or Redundancy
Another major “con” that’s still a big gripe with us is the complete lack of any and all data backup and redundancy. A huge part of self hosting your own data is ensuring that it’s properly backed up and secured from things like a failing drive, someone accidentally deleting something, stuffing up a configuration change or even worse, a ransomeware attack.
These sorts of critical files will normally be stored on a NAS which by default provides data redundancy through RAID. This allows for 1 or more disks to fail and still have your data be safe. With Umbrel, you only have 1 drive… so if it fails then poof. All your photos and files are gone. Not great.
While you can setup some data backups using apps like Syncthing, we’d prefer to see this critical task be built right into Umbrel with many different options similar to Synology’s HyperBackup app.
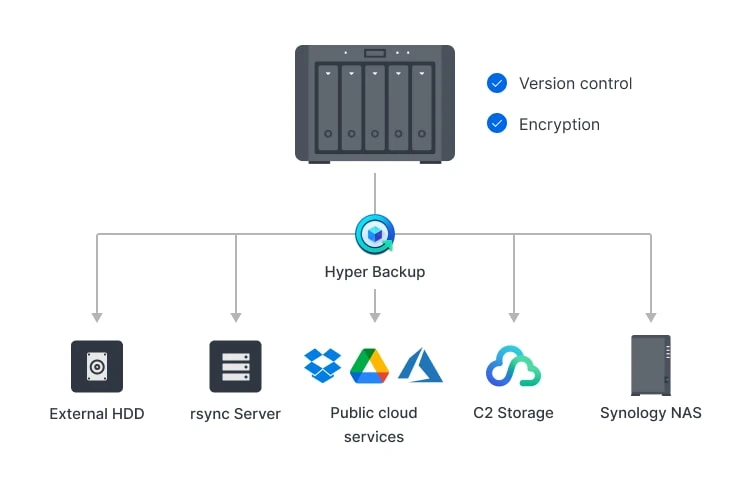
Having a simple wizard interface that lets users seamlessly backup all their data (over an encrypted link) to an off site location is an absolute must. If your house burns down or your Umbrel gets stolen or destroyed for any reason, you will be glad you kept a nightly backup offsite!
Must Have Umbrel Apps
While there’s dozens of available apps, here are a few that we’d recommend you install straight away to get you started:
- Bitcoin Node & Electrs Apps: Run your own full Bitcoin node and independently store and validate every single Bitcoin transaction with it. Connect all your wallets to it and hugely increase your privacy too
- Lightning Node: Run a personal Lightning Network node, and join the future of Bitcoin by creating your own Lightning channels as well as sending and receiving your own Lightning payments or routing others for a profit
- Mempool: Run your own instance of the Mempool open source project and trust no one. This is a must for privately confirming your transactions have been confirmed on the blockchain
- RoboSats: Simple and private Bitcoin P2P exchange that works entirely over Lightning
Other stand out apps that you might want to try include Home Assistant, ThunderHub, Mealie, Nextcloud, Nostr Relay, Node-RED, Passky or Vaultwarden, Plex, Pi-Hole, RoboSats, Syncthing or Tailscale.
Backing Up Your Umbrel
Finally don’t forget to backup your Umbrel once you’ve configured everything. While Umbrel doesn’t currently have a fully encompassing backup process, two critically important parts are ensuring you have a copy of your bitcoin node seed phrase as well as your Lightning channels.
While Umbrel’s Lightning Node app does perform automatic backups, it’s also good to download a copy yourself every now and then if you’ve got a decent amount locked up in Lightning channels. To do this open up the Lightning Node app and click the three dots in the top right hand corner, then click Download Channel Backup File.
FAQ
Is There A Cost To Run Umbrel OS?
No. For now downloading and running Umbrel OS is completely free.
Can I Access My Umbrel From Different Devices?
Yes. Your Umbrel can be accessed by any mobile or desktop device on your local network just by typing in http://umbrel.local into any browser. If you want to access it from outside your network then under Settings -> Account -> Remote Tor Access you should see a Tor address that can be entered into any Tor enabled browser.
Can I Run Umbrel On Devices Other Than A Raspberry Pi?
Yes. Umbrel can be run on any x86 or ARM based Linux machine, this means you can install umbrelOS on your own hardware, regardless of what it is. Simply go to a terminal and issue the command: curl -L https://umbrel.sh | bash
Is Umbrel An Operating System?
Umbrel is the company. umbrelOS is the operating system and Umbrel Home is a pre-built piece of hardware that you can buy fully assembled and setup ready to go.
Does Umbrel Use Bitcoin Core?
Yes. If you install the Bitcoin Node app from the app store, your Umbrel will run a dockerized version of Bitcoin Core.
Is Running A Lightning Node Profitable?
While it’s entirely possible to earn a profit by running a Lighting node, it’s not an easy thing to do. We cover all the aspects to this and how to set things up in our dedicated piece: Bitcoin Lightning Node Profitability

